In 1985 and 1987, CN had 8 SW1200s rebuilt using a long hood from a GP9, the
SW cab and chassis with Flexicoil trucks. From the combination, the Sweeps
were born. Apparently they were done in two lots, 7101 and 7102 being the
first in 1985 and the other six following in 1987. One difference I think
I can tell for sure between all of them is 7101 has a different style
numberboard and headlights on the cab than the rest of the photos I have come
across.
7101 - http://www.rrpicturearchives.net/showPicture.aspx?id=42307
The
rest that I have definative pictures of were ones like on this SW1200
(caution lots of popups) http://www.railpictures.net/viewphoto.php?id=19337
including7100,7104,7105, 7106 and7107. If anyone could let me know about
7102,7103 and 7108 I would appreciate it. Knowing about the numberboards will
come in handy later as my Miniatures by Eric kit has the type that are like
7101.
Modelling a Sweep
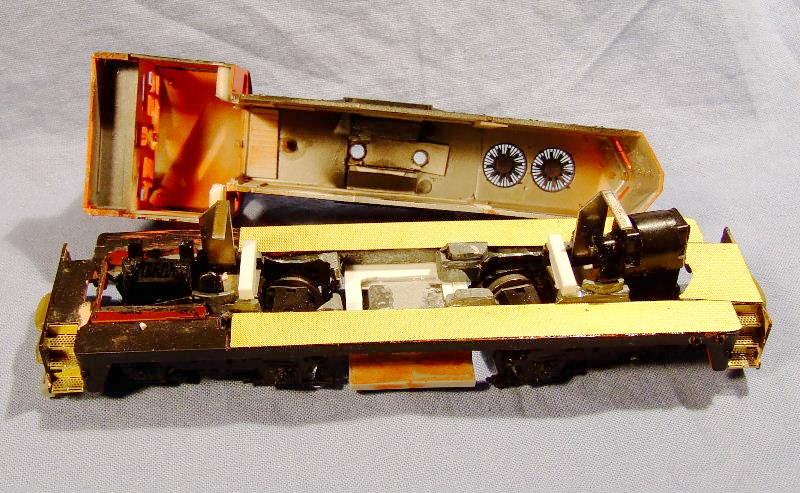
I started with an Athearn
SW7 chassis and body. I bought some Flexicoil sideframes, removed the
hood and cab as you can see from the photos. The hood I am putting
on much narrower so, as you can see from the photo, I need to
fill in the area. My plan is to use some of the Cannon & Co walkway
material after I get the frame milled. The hood is a Proto 2000 GP9 PhII
or III long hood. As you can also see some panel switching need to be done
to get the louvered doors in the right spot. Let's not foget filling in the
dynamic brake fan and cutting in a channel where the exhaust stacks will
reside. I also took out the filter for the dynamic brake and I am going to
fill those with some of the proper filters done by Jay's Trains. Also the
hood has not been cut to length yet.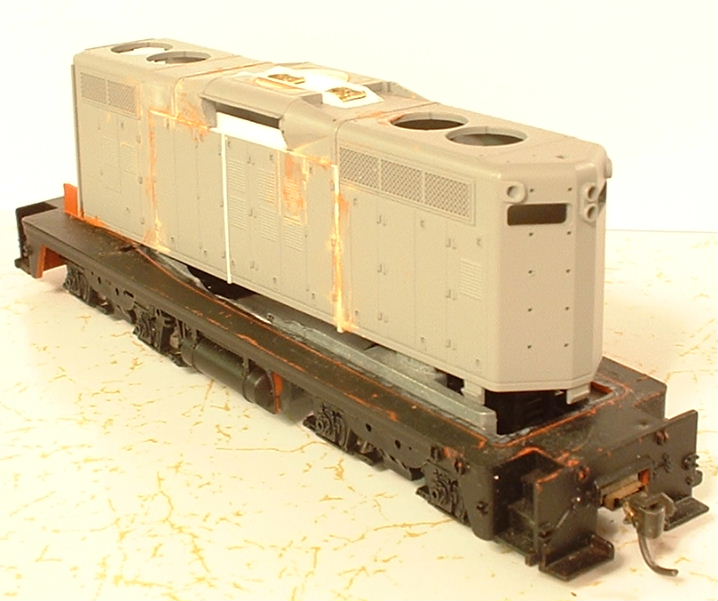
Next, I
obtained two SW14 cab kits from Dan Kohlberg (http://home.mindspring.com/~paducah) . I cut apart the
rear walls from that kit and then cut away the corresponding part of the
Cannon SW cab wall and married those two. Here is that wall with the
partially assembled cab put on the chassis for reference while I was
waiting for the putty to dry. As you can see I also added some panels from
a Cannon subbase kit to the bottom of the cab sides.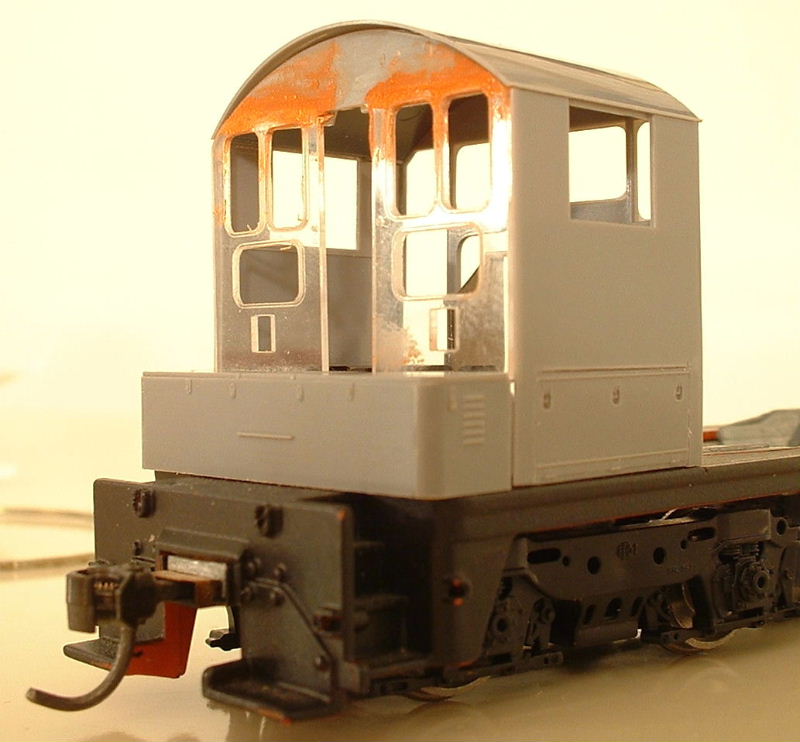
After fitting the back wall into the cab I realized that I needed to shim the
wall a bit so that the fit was snug. Although The orginal back wall of the
SW14 kit is designed to fit in, some shimming may be required to make the fit
better. I used a scale 1x4added onto the side, trimmed to fit
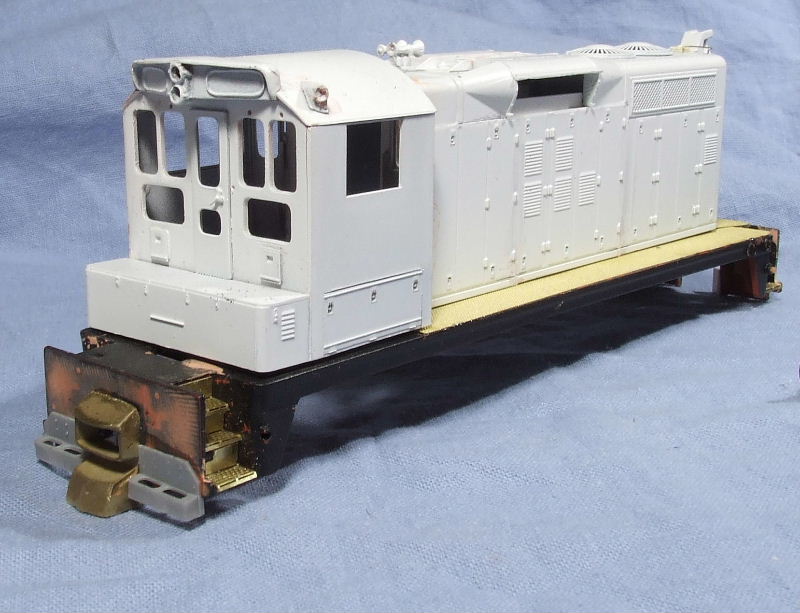
OK, thigs have progressed since last time I was here. I have modified a
Miniatures by Eric piece for the coupler buffer plate, added the Cannon walkway
material, the Aline steps and the Detail Associates MU pockets at least on one
end. I also added the missing details on the cab and roof except for the
lift rings. I have also glued the cab to the hood and primed the whole
shell.
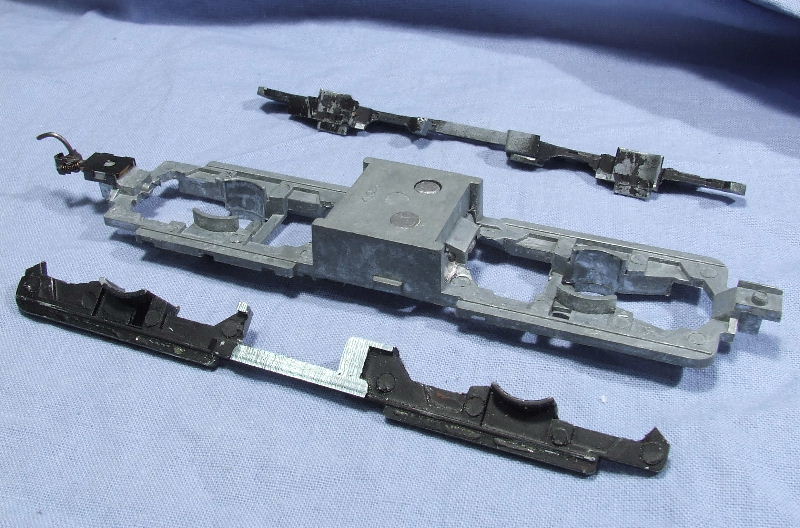
Then I was smart enough to ask my friend Jim if he could use his mill to
remove the fuel tank since I needed to replace it with one from a Lifelike P2K
SW9/1200. What you see in the next picture is a stock looking Athearn SW7
frame in grey. On either side of it you see the BROKEN, (yes Jim broke it)
SW frame I was going to use in black. It broke accidentially as he was
milling the fuel tank off. Now I am not mad at Jim because 1) I expected it
not to last as there was not much support left and 2) it still works as I will
epoxy the two rails to the bottome of the shell underneath the
walkways. Because of the way the Athearn trucks mount, no cross brace
needs to remain to keep the trucks attached like they do on the other
Athearn frames like the GPs and the Dash 9. Mounting a motor will be the
next problem
Boy was I wrong!!! The cross braces are needed so I epoxied some in place so
that the ride height is fine but now I need to decide how to attach the shell to
the walkway.
And you can also see the LL P2K SW fuel tank that I shortened to
fit 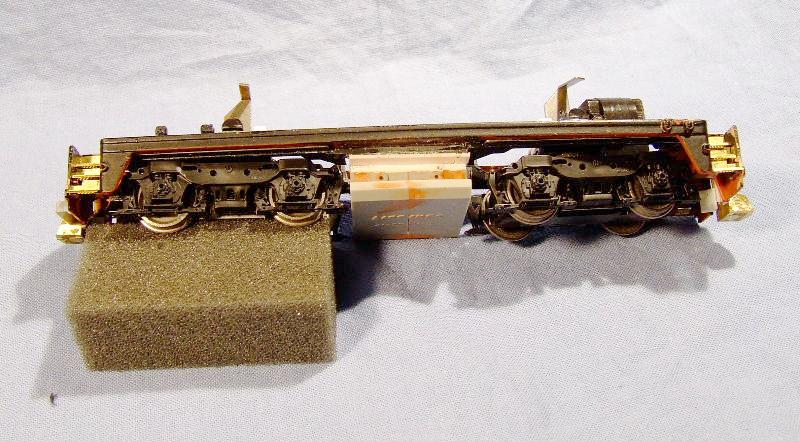
New Info May 6/08
Well, I finally have made some progress. The styrene cross braces did
not hold up and I didn't want to do a half baked job. For the life of me I
couldn't figure out what to do so I put it aside for a few months. The
other day I had a brain wave. Change the ride height from the bottom
and no pressure will dislocate the styrene so that is what I did. I added
.060"x.030" styrene on the lip of the truck and my factory ride height came back
to where it was. 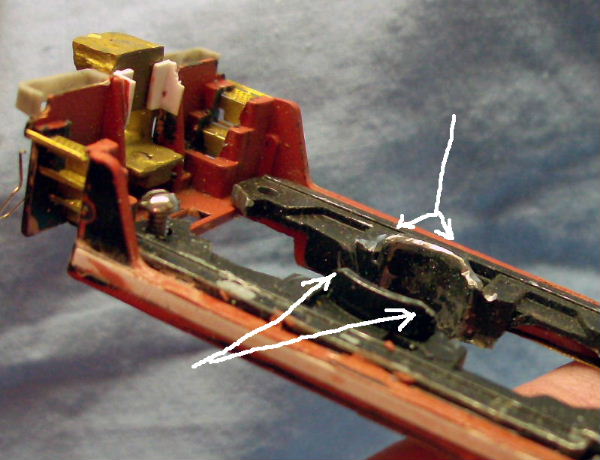
Next problem was that the
styrene would catch on the frame where it rides, so I modified the frame by
rounding over the ends of the truck cups.
Then arose a new problem. Affixing the hood to the
walkway/chassis combo. This was an easier solution than I thought. I
built up the step portion of the cannon cab and put a block of styrene in the
end of the long hood. I then drilled holes through the frame where I
needed to 'catch' the new styrene. You can see the screw holes in the
photo below. Two on the left ends of the metal frame and one done in the
styrene 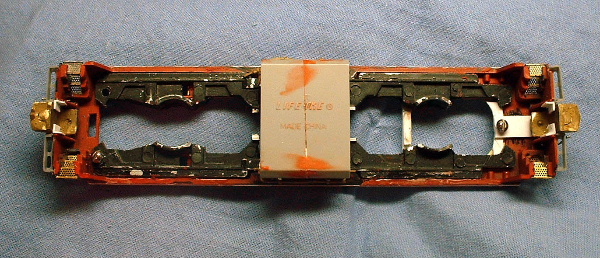 I added on the right side. That single screw introduced a new
clearance problem on the truck. I just need to shave the
truck dow
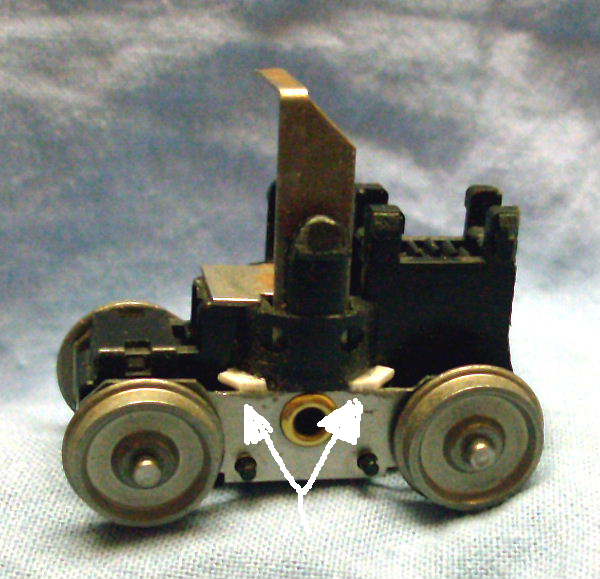
I added on the right side. That single screw introduced a new
clearance problem on the truck. I just need to shave the
truck dow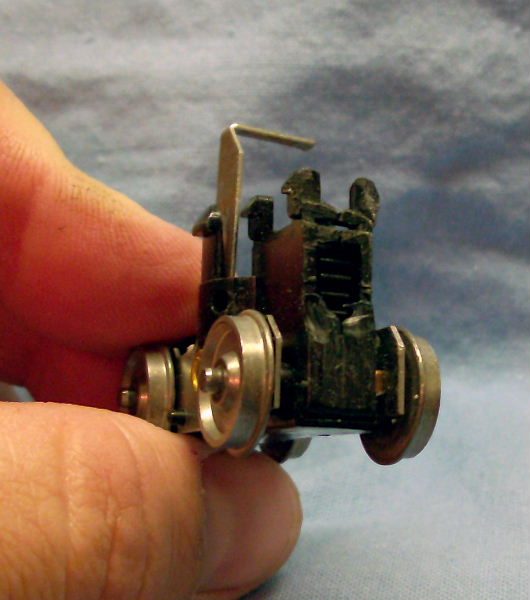 n so it
would clear the screw head. Either that or find a smaller headed
screw.
n so it
would clear the screw head. Either that or find a smaller headed
screw.
I
have come to realize that this loco will not be powered...at least
not just yet. The motor I have will just fit under the hood but seems
a bit long and is a bit snug side to side. I am hoping to get a second
opinion in a couple weeks from a friend who regularly repowers his stuff. I
have added some pilot detail but that is some pretty basic stuff. Next up
painting, decalling and final touches.